How to Insert an Image from Picasa to your RedGage Blog Post

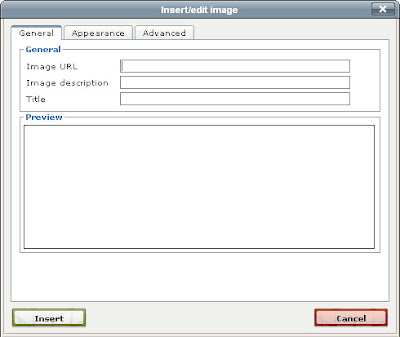
The process of inserting an image in your Redgage blog is quite different. If you look at the Insert/ Edit image dialog box show above, it only allows you to insert images already uploaded in a server in the Internet.
In this tutorial, I will show you how to insert an image into your Redgage Blog if your image is stored in Picasa.com web album
1. In the Redgage Blog Content editor, click the Insert/Edit image icon.
2. Open another browser window or tab and log-in to your Picasa.com account.
3. Select the image you want to insert (assuming that you have uploaded it there already).
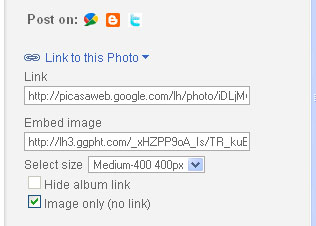
4. On the right side of the Picasa.com window click the link labeled Link to this photo .
5. Then you will see the information shown in the picture below

What you need is the text in the Embed Image textbox but before that you need to do some changes.
6. Change the size. On the size selector, select the size that you want. Personally I use the medium size (as shown) but if your image is smaller than 400px X 400 px, you will not have that option.
7. Check the Image only Check box
8. Select the text on the Embed Image text box, then Copy (Press Ctrl-C on the keyboard or Right-click -> copy)
9. go to the Redgage Editor (assuming the Insert/Edit Image dialog box is open) then paste the text on the Image URL text box
10. Fill in the other information then click Insert.
Then you may continue with your blog post.

