Inkscape draw : document file directory
Hi everybody,
French version :
Following screencast # 6,
http://screencasters.heathenx.org/wp-content/videos/ep006/ep006.html
Then download the English version of Inkscape is wonderful to version 0.48 and is very successful against the competition pay
http://inkscape.org/download/?lang=en
we will achieve this type of drawing:
Draw a rectangle L 800 x H 600 px.
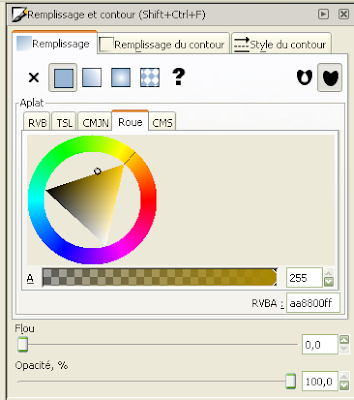
Associate the color aa8800ff (orange pulling brown).
Uncheck the contour
Duplicate this rectangle, given a black, a blur of 5 and place it below this one:
Duplicate the rectangle again and assign the value L 200 x H 60:
The position on the top left side with a slight shift to make the folder format of a realist.
Go to the Edit the nodes icon :
Round the top right of the small rectangle to round the corner:
Duplicate this small rounded rectangle and set its color black, open up the interface of the brush to assign a blur of 5:


Place it below the orange using these icons, click on the icon at left to position the black rectangle below the other orange

Duplicate again the large rectangle and apply a format this time 800 x 500 and choose the color: d4aa00ff; Go to the menu "Path", "Object to Path" (Ctrl Shift C) which gives this drawing:
You will notice four diamonds on the corners of the rectangle; interface corresponding to the nodes.
Click one located at the top left of the rectangle and you will see the emergence of absysse (x) and y (y);

In this case, I have to figure absysse (x): 126.181;
Assign to 426.181;
Note that the decimal does not matter.
Then click on the diamond at the top right:
I have to figure absysse (x): 926.181;
Assign to 1,226.181, which must look very much like this:
Duplicate this rectangle-trapezoid for giving it a black and a blur of 3; Click down a notch (second from left):
Duplicate this rectangle-trapezoid still orange and assign color d3bc5fff; Select edit the nodes; Click the top left;
I have to figure absysse (x): 426.181, 376.181 to Position; (ie d - 50 px)
I have to figure the ordinate (y): 572.047, 552.047 to Position; (ie d - 20 px)
Click on the diamond at the top right:
I have to figure absysse (x): 1226.181, 1176.181 to Position; (ie d - 50 px)
I have to figure the ordinate (y): 572.047, 552.047 to Position; (ie d - 20 px)
Click twice on "down a notch" (second from left):
which must closely resemble this:
Again duplicate this rectangle trapeze to make a shadow. Select F1 to enter. Arrow icon for a "select and transform objects" in the top left of the Inkscape menu. He will appear in the foreground. A black color and a blur of 3; Click three times on "down a notch" (second from left):
Duplicate the rectangle trapeze has to 1050 x 480; If the black rectangle appears with the blur to 3, enable it to 0, change the color to a0892cff; Select "Edit nodes", click the diamond in the corner top left of the rectangle;
The absysses are: 376.181, 126.181 to Position; (- 250 px);
The ordinates are in 1176.181; Set to 926.181; (- 250 px);
Then select "Transforming Objects"

position X is 126,181, with 146,181 to shift change:
The position 800; change to 760 px
Laposition H 480; change to 550 px
Click four times on "down a notch" (second from left):
Duplicate this restangle (Ctrl D) Change the color to black blur of 4;
Click five times on "down a notch" (second from left):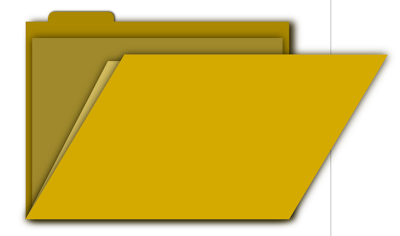
Duplicate again the rectangle that is 760 x 550 px twice; Apply a 1 px black border;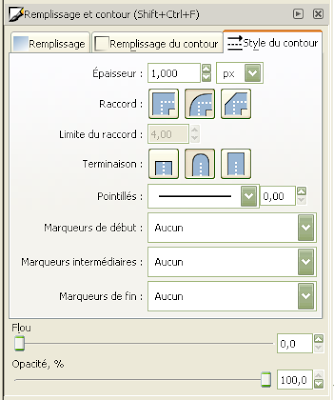
Go to the Path menu, and select "Object to Path"; Return to the Path menu, select "Dynamic Offset" (Ctrl F) A small diamond or circle appears on the edge of the rectangle, hold down the Ctrl key and the using your mouse drag as you see fit; Then select the rectangle that lies beneath him to remove the border of 1 px:
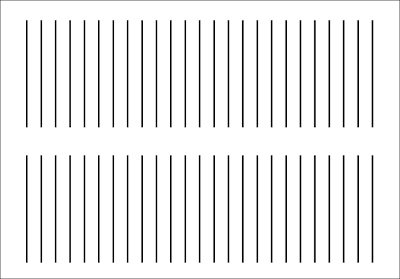
Then, make a line in a rectangle added with a contour and to minimize that represents a link; duplicate this trait and align relative to each other, as shown below:
Importante Note : Important Note: Please move this rectangle representing a white sheet so that the file also does not interfere in the group of all objects
Select both lines and duplicate them (Ctrl D) Getting the Object menu, then select "Transform". In the motion tab select Horizontal in 25 px and press "Apply":
Duplicate them again and "Apply" and so on until the final result.
Once this is completed, the final design looks like this:
There is probably a faster method, I will try and add in another article later.
Importante Note : I found a way through the screencast 31:
http://screencasters.heathenx.org/wp-content/videos/ep031/ep031.html
go to the following article: Inkscape Drawing: Interpolation
http://cleroy61-blog.blogspot.com/2009/10/inkscape-dessin-interpolation.html
Duplicate this rectangle, apply a black and blur of 3; Then position below the sheet, select the entire drawing and tap the "Group" icon; Place this sheet on the folder and press 4 times for him down four notches; We realize it is too large, then adjust the L and H at 740 to 530;

Start with the rectangle of orange trapezoid leading to duplicate it (Ctrl D). Reduce using the mouse and the Ctrl key. Apply a stroke of 5 px and dotted with a Blur of 2, select the linear gradient and stops to add more color gradient as below: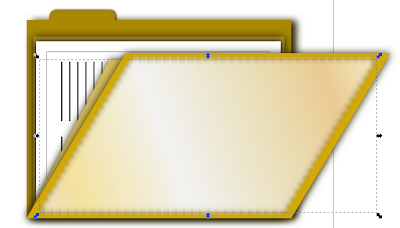
The round left, I assigned the color efdfc0ff, the second diamond f4e29eff, the third diamond f2f2f2ff, fourth diamond eadfb7ff, eacb92ff the fifth and last on the right f1e6baff.
I forgot to put a label text; Draw a rectangle H 150 x L 60. Adjust a rounded; Assign color # a0892c; Duplicate it, assign a black blur 5 px and position it at the back of the colored rectangle trend orange-brown; Grouping these two rectangle.
Dispose the rectangle on the back by shifting one or two or more notches below where it will lie:
Addendum 15/09/2011 :
How to make the transformed image in drawing?
It's pretty simple, take any image and drag it into Inkscape.
Not link it. Click confirm .
Go to menu and select Path : Trace Bitmap
In the "Assists multipes: creates a path group"
click Color and OK
Then move the drawing that superimposes your image on the sheet.
Then, for the text in Inkscape 0.46 orange and vertically, take the sheet with two columns above, delete the first column, use:
Inkscape 0.46 Adjust the center of the page icon with the "Align and distribute objects ", the last on the right:
Here, the final image with two sheets easily achievable:
Note importante : Note that the shadows are cut; To apply this background behind the design:
Addendum 15/09/2011 : To add a useful complement to this tutorial, you can provide a date with a reflected effect is on file in the case of a school year, for example, is on the wallpaper.
Click on the letter A | representing text objects on the left of your application Inkscape:
Then enter the year eg 2011
We will clone and not duplicate the text object with the cloning tool in the Edit menu, Clone and Create a clone .
What's going on? Inkscape creates a clone of your text object, so either you move as you want, or you could reverse it using the icon in the fourth from the left below desous: Yes, that one! pfff!
As you will see your clone!
Press Ctrl and click the clone text and drag down your clone.
Why clone? Well, it's simple; resume your date not cloned, and change from 2011 2012. You will find that the date changes automatically cloned without touching it! Magic, no!
Here, an exmple, but I do not provide the .svg file, the date 2012 was cloned, so the date changes automatically shadow:
http://cleroy61-blog.blogspot.com/2012/01/dessin-inkscape-bonne-annee-2012.html
Now, I put the file available to the representative drawing SVG:
http://www.box.net/shared/bmvpqfxorb
Note importante : Only the icon representing the Inkscape logo is an image and not an SVG file that I want.


